
Introduction
If you’ve ever wondered what makes your Windows programs tick, you’re in the right place. In this article, we’ll delve into the world of Portable Executable (PE) files, the backbone of Windows executables. While it might sound technical, don’t worry; we’ll break it down in a way that even non-techies can grasp.
PE Structure
Imagine a PE file as a blueprint for your favorite video game. It contains all the instructions and data needed to run the game smoothly. Let’s take a closer look at the key components of a PE file, without diving too deep into technical jargon.
DOS Header
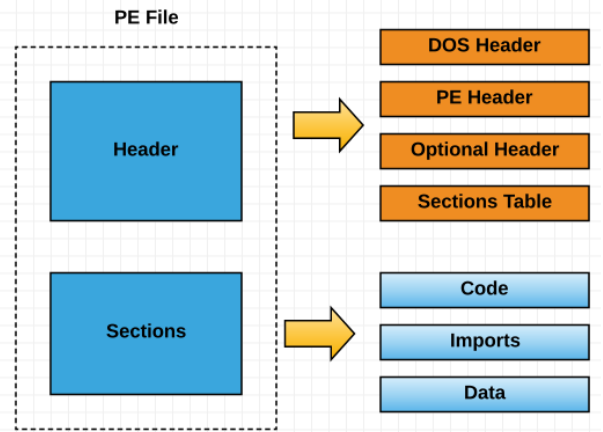
Think of this as the welcome sign at the entrance of an amusement park. It’s the first thing your computer checks to ensure the file is legit. No need to stress over the details; just remember the “MZ” magic number.
DOS Stub
Before the real action starts, there’s a short message, something like “This program cannot be run in DOS mode.” It’s like the notice at the park entrance reminding you to follow the rules.
NT Header
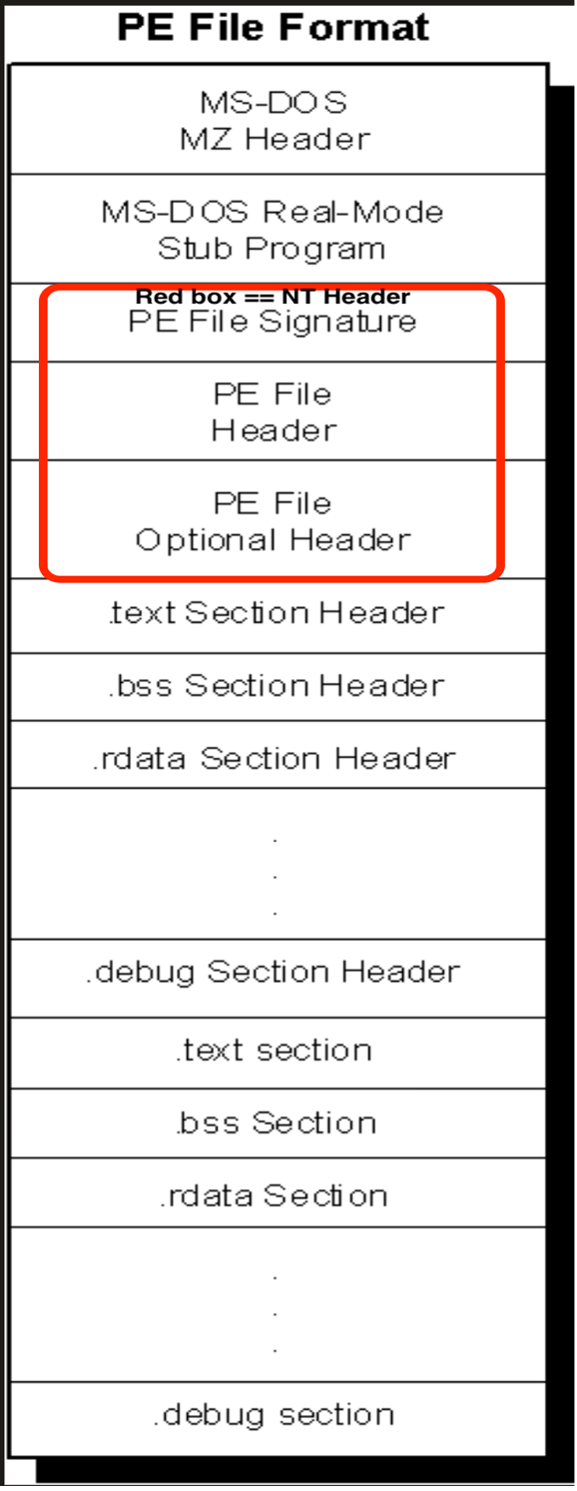
Now, let’s head inside the park. The NT Header contains all the essential info about our executable. It’s like the park map, showing where everything is located. The “PE” signature here tells your computer it’s dealing with a PE file.
File Header
Our map gets more detailed. This section reveals crucial information about our executable, like the number of sections (think of these as different areas in the park) and what kind of program it is (a game, an app, or something else).
Optional Header
This part might sound “optional,” but it’s actually vital. It provides even more specifics about our executable, like its size, entry point (where the fun begins), and memory requirements. Consider it the detailed description of each attraction in the park.
Data Directory
This directory is like the park’s directory board, telling us where to find different features and resources. You don’t need to know the details; just remember it keeps track of important things.
PE Sections
Finally, let’s explore the different sections of our park (PE file). Each section has its own purpose:
- .text: This is where the actual code resides, like the instructions for the rides.
- .data: Here, you’ll find initialized data, like souvenir shops stocked with goodies.
- .rdata: Think of this as the section with signs and labels, all non-changeable.
- .idata: This part handles imports, like inviting guest performers.
- .reloc: It ensures everything fits together, like adjusting rides’ positions.
- .rsrc: This is where resources like images and sounds are stored, just like the park’s decorations.
Conclusion
See? Understanding PE files isn’t as daunting as it seems. Think of it like exploring an amusement park, with different sections, maps, and directions. Knowing a bit about PE files can help you appreciate the inner workings of your Windows software, even if you’re not a tech wizard. Stay curious, and keep exploring the fascinating world of technology!